
How to Exchange XXXXX Step by Step
In this video we will explain how to change the Motherboard Bios, but it serves to understand the change of XXXXX as the procedure is very similar in most cases.
To buy XXXXX just access our sales website at https://www.seventecsmd.com.br/
If you are outside Brazil (we serve more than 150 countries) and wish to purchase our products in US Dollars, please contact us at:
Whatsapp: +55 47 99249-7472
Below is a description for carrying out a professional bios chip exchange using XXXXX. These are just tips to help with the exchange, adaptations are the responsibility of the customer.
1° Disconnect all types of power supply (including the Bios battery).
2° Check if the board model to be replaced has a Bios and if it is Dual Bios. If it is Dual Bios, replace the correct chip.
3° Before removing the chip to be replaced, observe the position of Pin 1 of the Chip and the position of Pin 1 of the XXXXX to which it is soldered.
4° Remove the Chip that appears on the board using a rework station (hot air blower). The temperature depends on the station and the professional (exposure time) ranging from 360°C to 450°C.
5° Remove the old solder with a soldering iron mesh (to avoid damaging the board, use a Japanese or American brand).
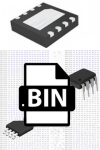
6° Place the new chip in the pin 1 position in the same direction as the pin 1 position on the board, observe the chip to be replaced and change it respecting the position of pin 1 (being the same as the replaced chip). The side that contains the chamfer or circle, counting from left to right in a U shape. As shown in the Figure below:

7° Solder the Bios chip by placing solder on all terminals with a soldering station. The temperature depends on the station and the professional (exposure time) varying between 360°C to 420°C.
8° Use solder flux to shape the solder and avoid causing cold solder.
9° Clean the flux with a non-aggressive remover or isopropyl alcohol with a purity of at least 99%.
10° Use a compressor to dry the cleaning residue. (the compressor must have an air filter and not expel water).
11° Check that there are no short circuits or soldering errors (if there is a short circuit, it will damage the chip).
12° Reconnect the power supply and test the board.
** For the board to work again, the problem must actually be in XXXXX **
Attention:
The evaluation, testing and whether or not it is necessary to replace XXXXX is the responsibility of the customer. We cannot know whether the defect is actually in XXXXX or in another component based on the symptoms reported. This is only possible for those who perform the test on the board. We count on your collaboration and common sense, so that you know that we are performing all the necessary tests so that no Chip or File is left with an error.
The correct chip or file to be exchanged and the need to exchange the chips on the board is the sole responsibility of the customer.
To buy XXXXX just access our sales website at https://www.seventecsmd.com.br/
If you are outside Brazil (we serve more than 150 countries) and wish to purchase our products in US Dollars, please contact us at:
Whatsapp: +55 47 99249-7472
Hugs team
Seventec Smd